This post was most recently updated on August 31st, 2022.
4 min read.If your customers are anything like ours, some of them love the new modern library view, some will adjust and some just hate it and want to get as far away from it as possible. While embracing the new stuff is usually smart, there’s some value to sticking to what works as well.
The Modern view is going to be the superior choice of the two (if it isn’t already!), but there are a multitude of reasons why one might want to revert to the classic view: the modern view doesn’t have all the bells and whistles of the classic view yet, all the instruction materials may be made for that view (and would have to be remade) or perhaps the change just broke all the customizations done using JSLinks.
All of these are valid reasons to stay in the Classic view for now! But why bring this up now?
This is pretty topical now, that Microsoft is switching all libraries to Modern by default and disabling the switch to force the classic mode (starting from the beginning of April 2019). However, this applies only to tenant-level controls – at least at first. You’re still able to change it for sites or lists!
What is the Modern view?
The Modern view for libraries is Microsoft’s new take on what SharePoint libraries should look like and how they should behave. Clean and a lot of the time miss straightforward than the Classic view, they’re now the default option for SharePoint Online and being pushed as being the primary solution for existing sites as well – although this change is of course quite slow.
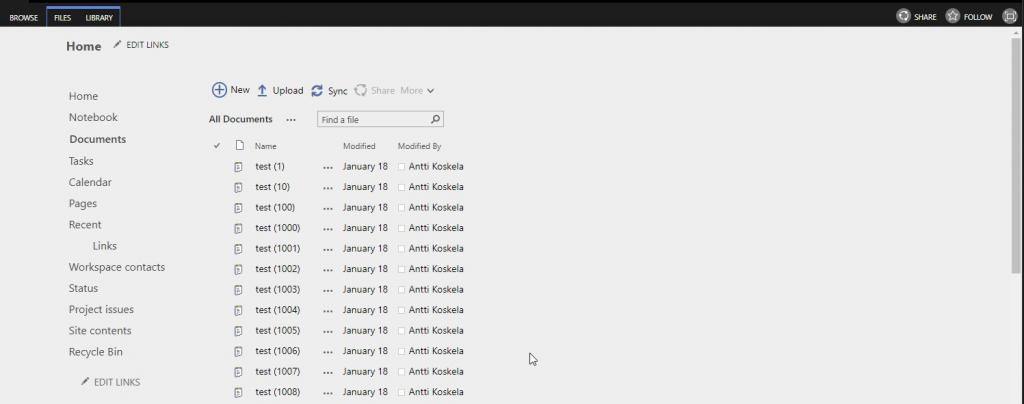
Below, you can see examples of both a Classic and a Modern view on a list. First, is the Classic view, that we all know and love :) Very “file explorer”-ish, but powerful, customizable, and most of the time easy enough to use anyway.
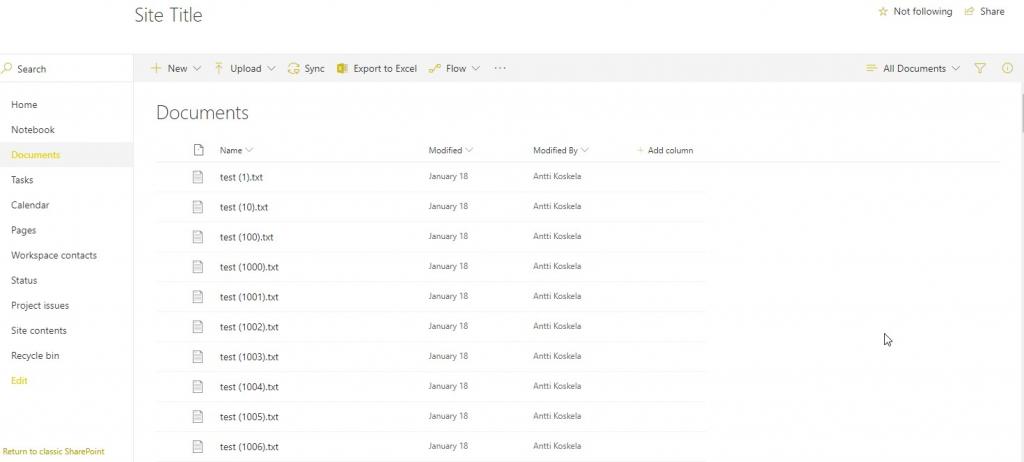
The Classic view is in stark contrast to the Modern view, though (below). The Modern view looks quite clean and sleek in comparison to the Classic one – but it also has handy shortcuts to a few things. That said, on a Classic Team Site, it IS a mashup of Classic and Modern views.
For the sake of the comparison, let’s include a Modern Team Site’s Document library below:
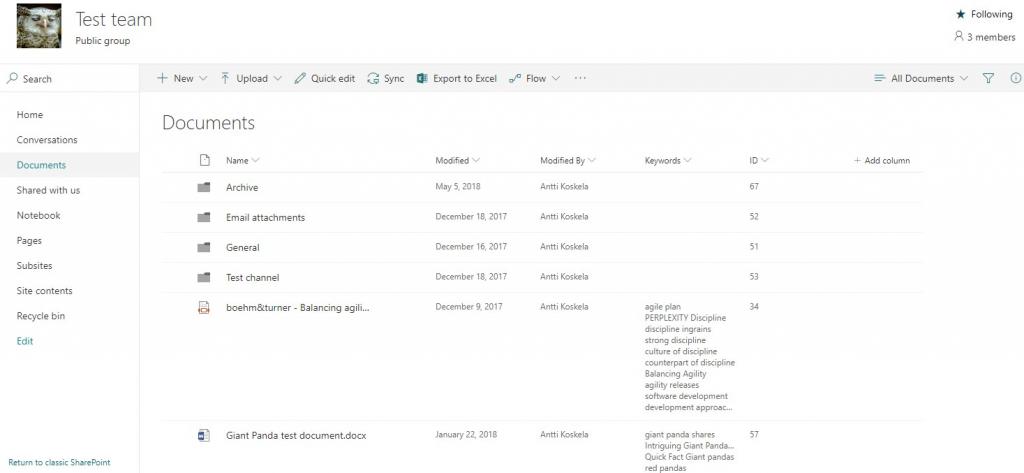
Similar to the Modern view on the Classic site, but additionally you can see the overview of the members of the site (you get direct access to memberships by clicking that little icon with the text “3 members”) and you can see things like group publicity directly on the view.
I’d argue, that most customers should prefer the modern view and get used to it. It’s here to stay. However, since the customization options are different, that’s not always feasible.
Why is Microsoft forcing the users to Modern view?
Ok – maybe that’s a bit of a strong statement. But it is what they’re trying to achieve in the long run – and Microsoft has good reasons!
The old – I mean, “Classic” world of ASP.NET Web forms and cripplingly heavy publishing infrastructure being the basis of every intranet, portal or even a team site for an organization are slowly becoming a thing of the past. The desire to get rid of the legacy code for Microsoft is understandable, and for the end-users, the improved user experience should be an easy sale.
Solution
In any case, this is how you can revert the view for any single library via PowerShell.
See below:
How to use PowerShell to set a list to use a Classic view
# Connect to a site
$cred = Get-Credential
Connect-PnPOnline -Url https://[tenant].sharepoint.com/sites/siteurl -Credentials $cred

# Get the list to update
$list = Get-PnPList -Identity "Shared Documents" -Includes ListExperienceOptions

# Set the list experience (0 = Auto, 1 = modern, 2 = classic)
$list.ListExperienceOptions = 2
$list.Update()
Invoke-PnPQuery
Voilà!
If the change is not reflected right away, be advised that’s likely because your view selection is cached. If you don’t get errors on List.ListExperienceOptions or Invoke-PnPQuery, the change has been successful. Hit Ctrl+Shift+Del, remove your cache items, and refresh the page (applies to Google Chrome, at least).
The script above has been borrowed from this article, which also explains how to apply the same steps to a web or a site collection!
Bonus Tip: How to detect which view will be used by default
Microsoft is nice enough to offer us a way to figure out the default experience used for a certain list :)
Here’s the C# code used for the operation:
using (var cc = new ClientContext(siteUrl))
{
    cc.Credentials = new SharePointOnlineCredentials(userName, password);

    // Load the AllItems.aspx file from the list
    File file = cc.Web.GetFileByServerRelativeUrl("/sites/contoso/Documents/Forms/AllItems.aspx");
    cc.Load(file, f => f.PageRenderType);
    cc.ExecuteQuery();

    // Check page render type
    Console.WriteLine($"Status = {file.PageRenderType}");
}
Further reading
- http://www.ktskumar.com/2017/11/3-places-manage-modern-classic-experience-lists-libraries/
- A great resource for the GUI options available for this use case.
- https://docs.microsoft.com/en-us/sharepoint/dev/solution-guidance/modern-experience-customizations-customize-lists-and-libraries
- Microsoft is definitely stepping up their documentation game :) This one, for example, is a pretty good overview of your options on customizing Modern list views.
- http://www.sharepointpals.com/post/PowerShell-Script-CSOM-Enable-Disable-Modern-UI-and-Classic-UI-in-SharePoint-Office-365
- Hate PnP? Take a look at this example then!
- How to output all Environment Variables in Azure DevOps with PowerShell? - April 9, 2024
- CSOM suddenly throwing exceptions when trying to access list contents in SharePoint? A weird fix. - April 2, 2024
- “Predefined type ‘System.Object’ is not defined or imported” and other System namespace stuff missing in your solution? - March 26, 2024
