This post was most recently updated on January 8th, 2024.
3 min read.This article explains in very brief terms – it is Christmas and I’m enjoying my 2-week-long European vacation, after all 😉 – how to make sure your Azure DevOps (YAML) pipelines fire on schedule. Because by default, they won’t. And I’ll explain to you why that (kind of) makes sense!
Problem
I’ve mentioned it before, but my employer is a pretty heavy user of Azure DevOps. You wouldn’t believe the amount of plumbing a global SaaS product like Omnia requires – but let me tell you, it’s a lot.
Anyway – some pipelines trigger manually, some trigger on a commit, some on a PR, some on a merge… And some are scheduled. And one scheduled pipeline I had refused to run on the schedule I had set.
Reason
When you configure a YAML pipeline to trigger on a schedule, the default configuration is to actually only trigger if there are changes to the local repository. That is, the repository that your pipeline is hosted in.
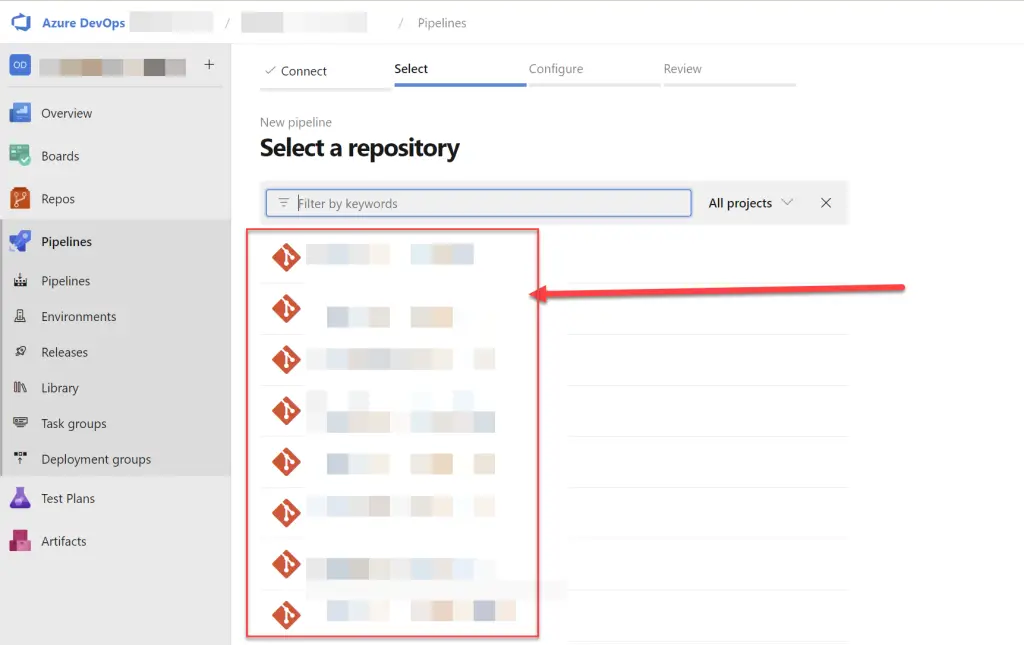
As a reminder, when you’re creating a new pipeline, you select a repository on the second step. It looks somewhat like this:

By default, your pipeline will only run if there are changes in that single repository after the last successful run of the pipeline. And that’s great, if that’s what you want (as in some cases it’ll just be a waste of build agent time)… But for me, it’s pivotal the pipeline runs every night, as I’m executing some maintenance scripts for our test/dev environments.
Why am I doing this in an Azure DevOps pipeline? Ah – that’s not the right question. The right question is “why not”..? 🙂
Anyway, in my case, if I want a pipeline to trigger on a schedule, I want it to run every. single. time. My pipelines typically build code outside the current repository, as I happen to host templates and pipeline files in one repository and different projects and products in other repositories.
I had set up the schedule in YAML with something like below:
schedules:
- cron: "0 0 * * *"
  displayName: Nightly script execution
  branches:
    include:
    - main
But alas, I was missing one crucial step. Let’s take a look at the documentation below:
schedules:
- cron: string # Required as first property. Cron syntax defining a schedule in UTC time.
  displayName: string # Optional friendly name given to a specific schedule.
  branches: # Branch names to include or exclude for triggering a run.
    include: [ string ] # List of items to include.
    exclude: [ string ] # List of items to exclude.
  batch: boolean # Whether to run the pipeline if the previously scheduled run is in-progress; the default is false.
  always: boolean # Whether to always run the pipeline or only if there have been source code changes since the last successful scheduled run; the default is false.
Did you notice it? always is by default “false”.
Solution
Yeah, easy enough – you’ll need to set always: true.
I’d also like to point out, that since you don’t want to trigger on every check-in (if it’s a scheduled pipeline), you should probably set up trigger: none.
Something like below:
name: Nightly retraction script

# Disable the trigger for main repository
trigger: none

# Set schedule
schedules:
- cron: "0 0 * * *"
  displayName: Build every midnight
  branches:
    include:
    - main
  always: true
And there you go! Now you’ve got a pipeline that’ll run every night, even if your repository has no changes.
Another configuration – very suitable for us lazy Europeans, as we rarely care to work during the weekends – would be to configure a nightly build pipeline to run every night during the weekdays, but run with a different configuration during the weekends.
See, maybe you’ll want to execute different set of tests during the weekend or make your build agents work during the day (so you don’t need to pay them the night work extra, making them work during the weekends is expensive in any case!)
So, here’s that for your reference:
schedules:
- cron: "0 0 0 * * 1-5"
  displayName: Midnightly build during the week
  branches:
    include:
    - main
  always: true

- cron: "0 0 12 * * 6-7"
  displayName: Midday build during the weekend
  branches:
    include:
    - main
  always: true
And there you are :)
References
- “Performing cleanup” – Excel is stuck with an old, conflicted file and will never recover. - November 12, 2024
- How to add multiple app URIs for your Entra app registration? - November 5, 2024
- How to access Environment Secrets with GitHub Actions? - October 29, 2024


