This post was most recently updated on March 19th, 2023.
6 min read.This article will go through different solutions for fixing issues with uploading pictures to your WordPress Media Library. There are plenty of reasons that could cause this issue – and a couple of different ways to run into it.
But fear not! I’ll be proposing a few different ways to fix the issue in your installation. And by “a few” I mean 10. Or more, if I have updated the list after writing this paragraph!
Unlike some of the more aggravated users suggest online, this isn’t likely to be a bug in WordPress – rather, it is a configuration/compatibility issue. Luckily, it’s usually something you can fix yourself.
Let’s get on with it, then!
Problem
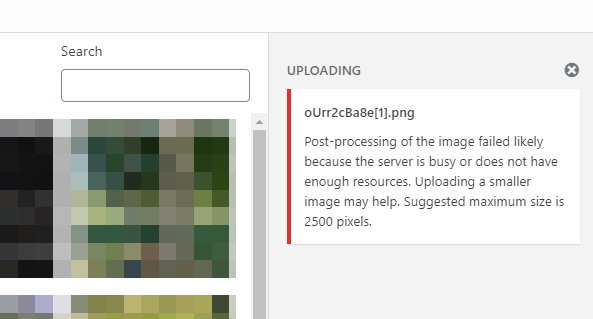
So, once more, the error you see is something like the below:
Post-processing of the image failed likely because the server is busy or does not have enough resources. Uploading a smaller image may help. Suggested maximum size is 2500 pixels.
This error might pop up in all of these different situations (and probably others, too):
- Pasting pictures in the WordPress Block Editor (Gutenberg)
- Uploading pictures to Media Library using the Image-block
- Uploading pictures to Media Library from the Admin site
So most of the time, it’s something that you run into when you’re uploading pictures to WordPress. So far, so good, right?
But the error is not accurate, and it won’t help you. It’s most likely NOT the server being too busy to serve you (it had one thing to do, right?), and uploading a smaller picture will usually not work at all. It’s much more likely to be a problem in the configuration.
Workaround
Before jumping into the actual steps to fix the issue, let’s quickly address a workaround that might help a bit.
At least for yours truly, a workaround was to upload pictures one-by-one directly to the Media Library from the Admin site, and refresh the page using F5 every time between uploads.
It’s a crappy workaround, as it only worked about 50% of the time, but it kept the site going before I figured out the actual reason.
And now – let’s move on to the actual solutions!
Solution
There are quite a few possible reasons that might cause this issue to pop up. And hence, there are quite a few possible ways to fix it.
I will try to outline some options in a simple checklist, so that you can go through it and find a fix that would work for you!
Time needed: 20 minutes
How to fix “Post-processing of the image failed likely because the server is busy or does not have enough resources.” when uploading pictures to WordPress Media Library?
- Try uploading your file using another browser
A quick and easy thing to start with – try uploading your file using another browser, or maybe just clear your cache to see whether that helps. Using the Incognito/Private browsing mode might also do the trick!
As pointed out by Jason in the comments -section below, it’s sometimes this easy :) - Rename your file
Don’t use weird file names! Apostrophes, quotation marks, exclamation marks – stuff like that is risky. Even in the 2020s, servers still don’t always understand anything more than your basic Latin character set.
Try renaming your file to something that only has a-z and numbers, and see if it helps. - Remove all of the cookies for the site
This is something a few people in the comments section have brought up: a quick thing you can try is to remove all cookies for your WordPress site. That’ll force you to sign in again, but there’s a fair chance it’ll actually fix the issue, and let you upload media files again.
Give it a try (and let me know if it works for you)! - Verify your upload limit
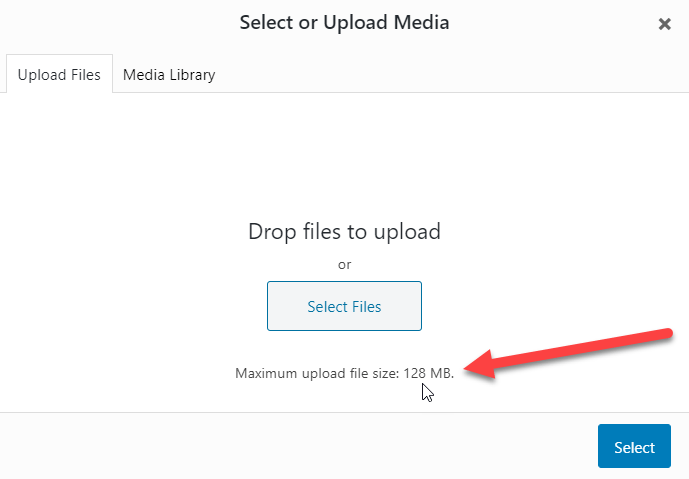
Your upload file size limit might be too low, so it makes sense to check this next – just open your Media Library and navigate to “Upload Files”.
Verify, that the “Maximum upload file size” is something meaningful – e.g., not “1 MB” or something.
In case you DO have something ridiculously small here, you need to increase the limit to something borderline unreasonable like 128MB.
There are multiple ways to change this. If you have access to the php.ini file, you can configure it right there. If you don’t have access to it (maybe you’re on shared hosting?), you can also edit your .htaccess file to add something like this:# BEGIN Increase upload max filesize
According to this: https://www.koskila.net/fixing-issues-with-uploading-pictures-to-wordpress-media-library/
php_value upload_max_filesize 128M
php_value post_max_size 128M
# END
You can remove the rows starting with a hash (#), they’re just comments clarifying to your future self why you have added this part to the configuration! - Verify your server resources
Verifying WordPress is able to use the server resources it wants makes sense. The error directly says this, after all:
Post-processing of the image failed likely because the server is busy or does not have enough resources. Uploading a smaller image may help. Suggested maximum size is 2500 pixels.
Hmm – despite what the error says, the server resources running out is almost never the reason for the issue. However, it’s simple to verify, so next, we’ll take a look at your web hosting plan!
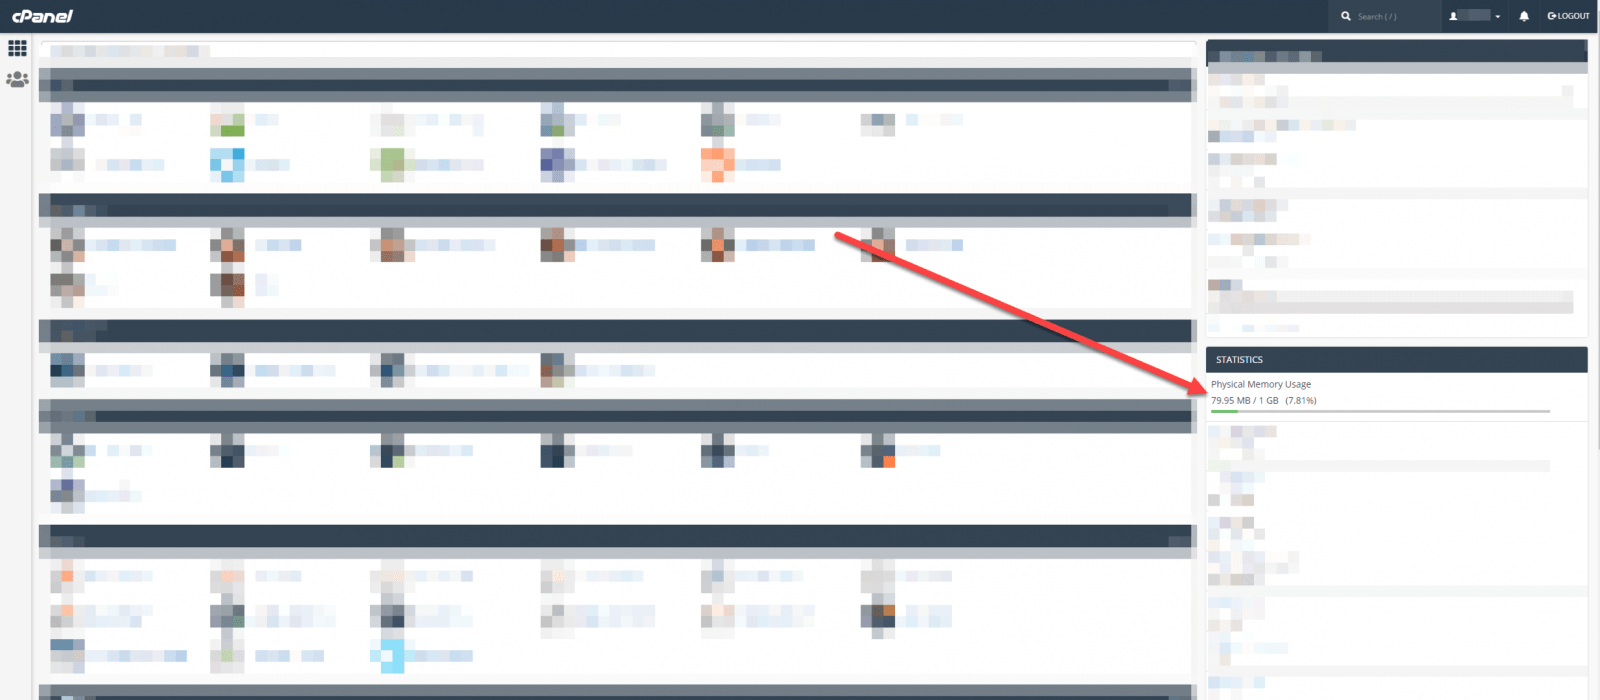
Navigate to cPanel (or whatever server/account management software is available to you) and check out the “Statistics” section (or equivalent) to see if the memory usage is anywhere close to maximum.
In case your server resources seem seriously underutilized, it might be a good idea to enable your WordPress installation to use a bit more of the resources. If you can edit your php.ini file, you can add this to the file:memory_limit = 512M
You can also try and add this to .htaccess:# BEGIN Increase memory limit According to this: https://www.koskila.net/fixing-issues-with-uploading-pictures-to-wordpress-media-library/
php_value memory_limit 512M
# END
Or alternatively, you can add this in your wp-config.php file:define( 'WP_MEMORY_LIMIT', '512M' ); - Select a supported PHP version
I’ve read a lot of people complaining about this on PHP 7.3 or PHP 7.4. While it DOES in fact work for me with PHP 7.3, you could try and see if downgrading to PHP 7.2 helps you.
At the very least that’ll help you narrow the issue down a bit! - Enable required PHP modules
You need to ha e certain PHP modules enabled as well.
Verify, that your PHP version has a module called “Imagick” enabled. This can be done by finding your PHP modules in your web hosting provider’s configuration panel and combing through them to find them.
This is different for each configuration panel, though! - Enable required Apache modules
I didn’t even have access to Apache modules in my case, so couldn’t verify – but I’ve seen a suggestion that a module called mod_fcgid needs to be enabled.
Even that didn’t help? On to the (even more) more exotic solutions! - Bypass GD Editor (whatever that even means)
Some people report adding this to your functions.php can help:
function use_gd_editor($array) {
 return array( 'WP_Image_Editor_GD', );
}
add_filter( 'wp_image_editors', 'use_gd_editor' );
It didn’t help me, but I thought I’d include it for the odd chance it might help someone else. - Disable or bypass Cloudflare if you’re using it
The issue could also be caused or exacerbated by Cloudflare.
This might be useful just for narrowing down the issue. Cloudflare will act as a proxy for your site, so while it might not break anything in itself, your WordPress installation might still misbehave. And Cloudflare might end up omitting the error messages you need to debug the issue!
If everything works just fine without Cloudflare, then you know they’re messing with something in your installation. What is it? Don’t ask me – just contact their support, because they’re fantastic. - Disable SecFilterEngine and SecFilterScanPost using .htaccess
Ah – this is a fun one! My issue (yes – I went through everything above, first) was resolved by disabling mod_security.
This is a bit unfortunate – but for whatever reason, it seems like it’s messing with Cloudflare (at least with the current WordPress version I’m running – 5.4.2). I suggest undoing this hack as soon as possible.
Anyway – here’s what I had to add to my .htaccess file:# BEGIN a horrible hack to fix upload errors
# See this: https://www.koskila.net/fixing-issues-with-uploading-pictures-to-wordpress-media-library/
SecFilterEngine Off
SecFilterScanPOST Off
# END a horrible hack
And that’s about it! That’s the article. Hope it helps – it’s helped me a few times already! :)
References
- https://wordpress.org/support/topic/error-with-image-uploading
- https://rethinkify.net/fix-maximum-upload-php-memory-issues-in-wordpress/
- https://wordpress.org/support/topic/post-processing-of-the-image-failed-3/page/2/
- Intellisense not working for Fluent components in Blazor project? Easy fix! - October 8, 2024
- winget is broken again. - October 1, 2024
- How to fix PowerToys FancyZones in Windows 11? - September 24, 2024


