This post was most recently updated on July 31st, 2022.
4 min read.This article will describe a surprising issue with Microsoft Teams, and a simple workaround. 😊 Essentially, using the out-of-the-box “Attach” > “Recent” messaging extension in Teams has a couple of caveats or edge cases, that make it problematic to use.
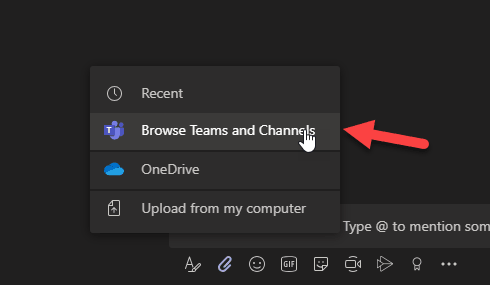
Instead, either move the file to the proper location using the “Files” tab or share a link to your file (also available under “Attach” > “Browse Teams and Channels”).
This post will describe the actual solution for moving the file safely, without data loss.
Problem
So this one’s going to be a quickie. A bit too long for a tweet, though (I tried). I ran into quite a scary.. Let’s call it a “feature”.
By using the “Recent” -menu in Microsoft Teams “Attach” messaging extension, you’ll end up uploading a copy of a file in your channel, but not necessarily the latest version of said file. In my particular case, I ended up getting a 4-hour-old version of a file that I had just modified myself about 30 minutes earlier.
What’s worse, I realized it was a copy of said file, so I went and removed the original file… Only to later realize that I had lost a couple of hours of work 😅
Anyhow… This’ll cause problems. You might lose some of your data, and clutter the rest with unnecessary duplicates.
Part of the problem (or maybe just an additional problem) is the fact that the “Attach” messaging extensions (or “Quick action” – whatever you want to call it!) create a copy of your document. If you’re trying to attach files from other channels to your message, you end up generating multiple copies of your files.
But that’s not the worst-case scenario! If you get unlucky (I tested this multiple times, it usually didn’t happen, and I’m 100% sure it’s not how it’s supposed to work), you might upload an older version of the file to your new channel, and the new version stays behind.
How to mess up moving your files in Teams?
The whole, unfortunate experience looks something like the below:

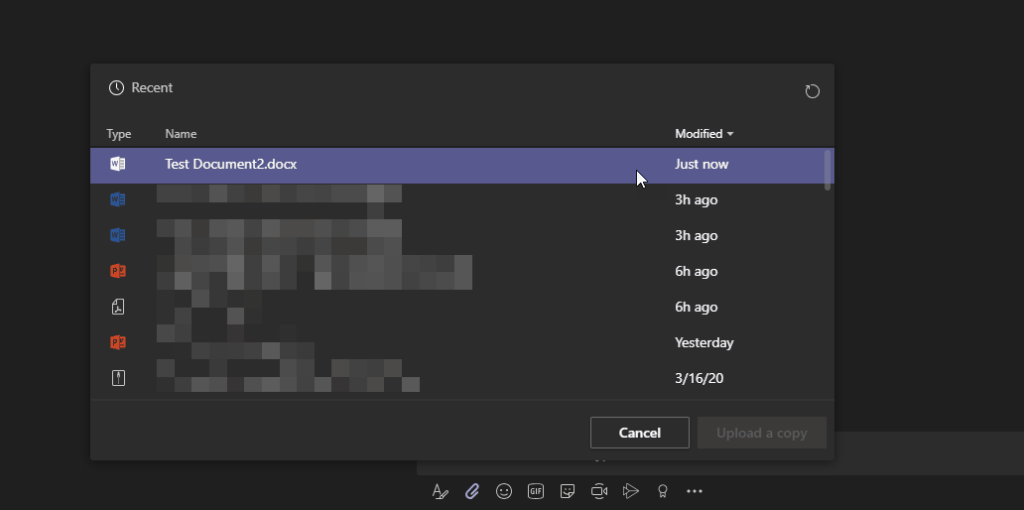
I have just modified the file above, and I want to upload it to another, less general channel (called “TestChannel”). I’ll navigate to that channel, start a new conversation and hit “Attach” -> “Recent”.

This’ll let me upload the file. The process takes about 10 seconds.

Navigating to the “Files” tab of the channel, I can see the file is now actually 4 minutes old, despite being modified roughly 30 seconds ago, and uploaded literally 10 seconds ago!

The content was also only partially missing – it seems like I was somehow able to upload an old version of the file I was just modifying.
Now, I suspect this issue is caused by your OneDrive for Business sync client (one of my favorite pieces of software ever developed!) serving your Teams client an old version of the file, and Teams then happily uploading that one to the channel.
I could be completely mistaken. But the bottom line is that using the “Attach” -> “Recent” is risky, since it:
- Could cause data loss 😬
- It will cause cluttering 😡
So you should move your files around some other way. But how?
Solution
Instead of using the “Attach a file” quick action to select a “Recent” file, it’s far safer to share a link to your file (if you don’t care where it’s actually located) or just find the file in the Files section of your channel, and move it to a new location, and share it from there (if the location needs to make sense).
Obviously, this is not for situations when you WANT to have a work-in-progress version of the document somewhere and then “publish” it – rather, this is for the situations when you just want to embed the file to the right channel with proper permissions, instead of creating a duplicate.
Essentially, the steps are as follows:
Time needed: 2 minutes
How to move a file from the Microsoft Teams channel to another?
- Navigate to whichever channel your file is located in.
If your file isn’t hosted in Teams at this point, don’t bother with this explanation – just “Attach” the file as you would.
If you already have the file hosted in another channel’s Files, follow this guide. - Open the “Files” tab.
That’ll bring up the files hosted for the channel! Find your file in the list.
- Select the “Ellipsis” button.
That’s the three dots at the right side of the name of the file in a list! It should open a new menu for you.
- Select “Move”.
All of the steps above in one screenshot.

- Choose the proper channel for your file.
This will move the file to said channel’s library/folder in the SharePoint site that’s hosting the Files experience for your Teams team/channel!
- Open the channel to which you want to post the file.
Great – now it should be safe to post about the file since it won’t be duplicated anymore.
- NOW you can use the “Attach” > “Browse – or just paste a link to the file in the Teams message!
Your file won’t be “uploaded” anymore, but rather it’s properly attached from its proper location.

And there you go! Once more, in case you just want to share the file, no matter where it’s located, you can also use the “Attach” > “Browse Teams and Channels” or use a sharing link without actually moving the file.
- Copilot Android app refusing to take pictures? I have the dumbest fix you’ll ever hear, but it’ll work, trust me. - February 26, 2025
- Adventures in the Windows 11 24H2-land: How to restore your webcam after February 2025 Patch breaks it? - February 25, 2025
- Have you heard? Dev Home is going away before it even arrived! - February 18, 2025


