How to use the Azure AD associated with your SharePoint Online
With the usual configuration of Office 365 and Azure, there might be multiple Azure AD (AAD) instances associated with your subscription. When creating registrations to whatever SharePoint-related apps that you might be using, if you create the registration to the wrong Azure AD, it can't access the data in your SharePoint. Or at least without further configurations, it probably won't get any data from your Office Graph API or whatever else you might want to use.
How to find the instance of Azure AD associated with your SharePoint Online
Luckily, it's simple! This guide will show you how to select the right AAD instance. It's geared towards a case where you're actually wanting to register a new app to your AAD, or if you're planning to use an enterprise application. The last step (4.) handles that part.
So - don't start by browsing portal.azure.com. That'll just let you access the Azure AD instance(s) associated with your Azure subscription - not your SharePoint Online tenant. Instead, there are 2 options:
Option 1: Use this URL to log in to your AAD instance
Log in to the URL below using your Office 365 Admin credentials:
However, note, that you should open this in a fresh (or incognito) browser instance, or make sure that you're opening it in a browser that's already logged in to Office365 as an admin.
Following that, you should get a page that looks like this:

Azure AD Management Page for your SharePoint Online
Didn't work? No worries, we've got another route. See the second option below next!
Option 2: Manual steps to find your Azure AD management portal
Okay, simply follow these steps:
Go to portal.office.com and choose Admin to access the administration portal. Note that you need to sign in as the global administrator (or some other role with sufficient access to the portal).
[

Office Admin Portal Icon Office Admin Portal Icon ](https://www.koskila.net/wp-content/uploads/2017/11/2017-11-02_16-26-311.png)
Office Admin Portal Icon
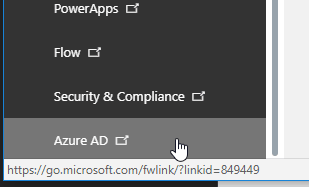
Then make sure you are signed-in in the right tenant! Each SharePoint tenant has an Azure AD associated to it, and that instance is where we want to do the registration. Select “Azure AD” from the “Admin Centers” -section on the bottom left.
[

Office365 Admin Centers -/> Azure AD Office365 Admin Centers -> Azure AD ](https://www.koskila.net/wp-content/uploads/2017/11/2017-11-02_16-28-501.png)
Office365 Admin Centers -> Azure AD
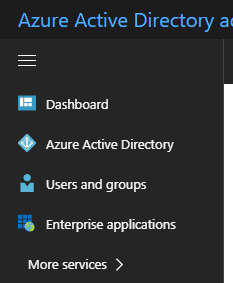
If need be – choose the correct instance of AAD by selecting your account in the top right corner of the page. Since it’s a tenant-specific AAD instance, it should look something like this.
[

Tenant-specific Azure AD instance Tenant-specific Azure AD instance ](https://www.koskila.net/wp-content/uploads/2017/11/chrome_2017-11-02_16-32-131.png)
Tenant-specific Azure AD instance – what it probably should look like!
Yes – it’s fairly barebones. It’s not supposed to offer many services – it’s just used for your SharePoint Online tenant and facilitating access there!
The next step depends on if you’re editing Enterprise Application (4.1) or Azure AD instance -specific app registration (4.2.)
- Select Enterprise Applications > All Applications from the left.
- Select More Services > App Registrations.
- The registrations there are fairly straightforward, so you should be good now! If you’re creating an app registration, just remember to configure the reply-urls with all possible different options 🙂
Credits and references
I got this tip from a coworker at Valo-team. Cool stuff!
Comments
No comments yet.