This post was most recently updated on July 31st, 2022.
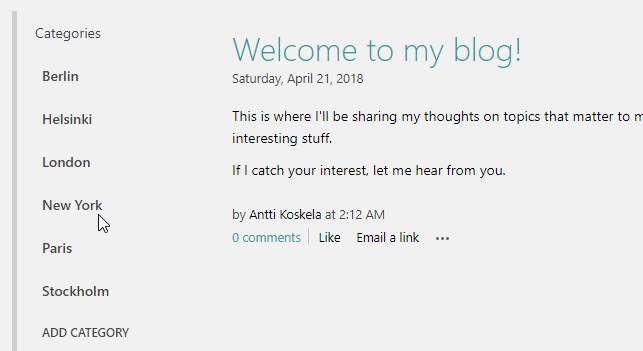
2 min read.Imagine this: you’re using a good old SharePoint blog site, and have a bunch of categories in use. That’s nice and easy – SharePoint offers the categorization functionality natively, and it works decently. Problems arise when you have a lot of categories, though – not all of them will be shown. Even if you tweak the web part to show more items on a page, this isn’t reflected on the whole blog site!
This article explains how to fix this in a couple of simple steps!
Problem
For background info – the category listing is actually an XSLT list view web part. It’s not obvious just looking at it, but to change its view you’ll need to modify the list view it’s attached to.
With low numbers of categories, this works quite nicely.
By default, however, SharePoint only shows 30 first (alphabetically ordered) of your categories. Weirdly enough, it doesn’t show any paging for them – and it doesn’t even indicate in any way, that it’s not showing all of the categories! This is a bit annoying, so luckily there’s a way to change this.
Solution
Time needed: 10 minutes
How to modify the Post list’s view to show more categories
- Create a new view for the blog post items list
Changing the settings for the list viewer web part is simple enough. But first, you’ll need to create a new view that we’ll be using for this web part. To do that, you’ll need to open the “Categories” list for your blog web (it’s usually in an URL like “/Lists/Categories/AllCategories.aspx”).
When there, just create a new view (you can base it on “All Categories” or create it from the scratch), set most of the settings to be whatever you want, but be mindful to set the “Item limit” to 99, and for the mobile view too! (see below)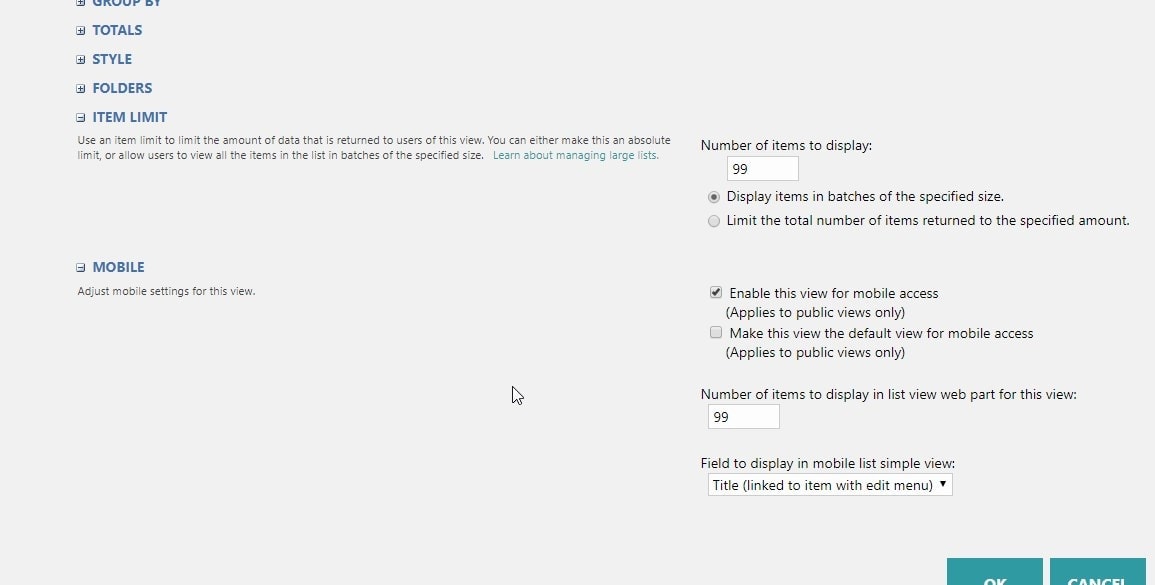
Creating a new view for the XSLT web part – 99 is the max number of items!
Click “OK” to save it. - Open the Categories webpart in edit mode
Great – now we’ve got the view, and we’ll just have to use it!
To achieve this, first, you’ll need to open the page in edit mode and edit the web part.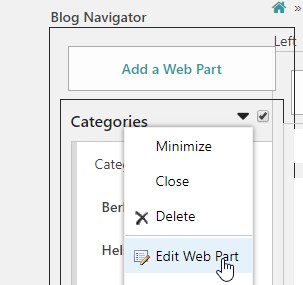
How to edit Categories -web part - Change the view of the Categories that webpart is using
Then, you’ll want to select the new view you created and set it as the default one for this web part.
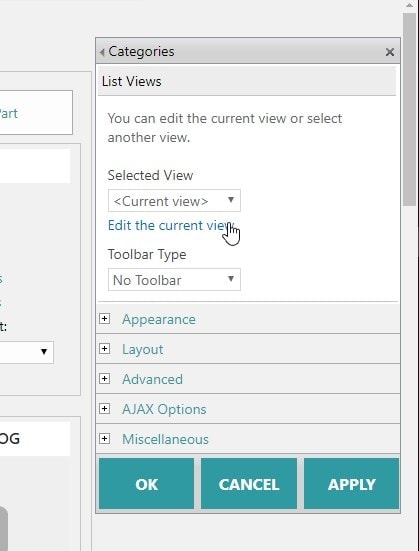
Edit the view settings for the web part - Edit the webpart EVERYWHERE
Now, there’s one more tricky part – you need to realize that you’ll actually have to do this for 4 different pages.
The default.aspx (blog home page), Post.aspx (page for viewing posts by ID), Category.aspx (page for filtering by category) and Date.aspx (page for filtering by month).
That’s a lot of pages to edit, but at least it’s a simple change!
After editing those 4 pages, you should be good! :)
- How to output all Environment Variables in Azure DevOps with PowerShell? - April 9, 2024
- CSOM suddenly throwing exceptions when trying to access list contents in SharePoint? A weird fix. - April 2, 2024
- “Predefined type ‘System.Object’ is not defined or imported” and other System namespace stuff missing in your solution? - March 26, 2024

