This post was most recently updated on September 30th, 2022.
2 min read.This post describes how to run Entity Framework’s code-first migrations against a database located in Windows Azure. This is done by running the Update-Database commandlet with suitable switches, see below.
The problem and symptoms
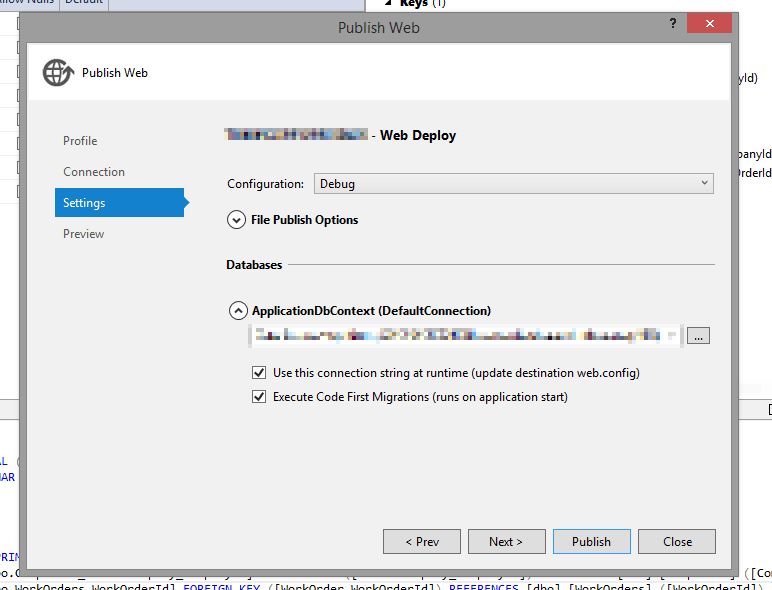
Okay, so you’re developing your MVC+EF cool web app with a database in Azure, and you’re using code-first migrations. Cool! What’s nice with code-first-migrations is the fact they are run automatically even in the cloud the next time your app is running (as long as you publish your app with that little box ticked – something like in the screen capture below). But wait – what if there are conflicts – what kind of errors are you going to get?

Not very useful ones, I’m afraid, and it’s a pain navigating the Azure portal to fetch the log files. At some point – for me, it wasn’t the first time I ran the web app, but during the phase when I was logging in – you’ll be getting the error the migrator internally throws. That might be enough to point you in the right direction, and maybe you’ll be able to figure out what’s wrong! But if that’s not the case, here’s the way to run Update-Database against your Azure Database!
Solution: Update-Database to the rescue!
Alright – you’ll actually just need to specify the ConnectionString for the command. If you have a wood league-level memory, just like me, you’ll have forgotten about the ConnectionString syntax already, so I’ll just write it down here for future reference. The whole script will be something like this:
Update-Database -ConnectionString "Data Source=****.database.windows.net;Initial Catalog=****;Integrated Security=False;User ID=****;Password=****;Connect Timeout=60;Encrypt=False;TrustServerCertificate=False;ApplicationIntent=ReadWrite;MultiSubnetFailover=False" -ConnectionProviderName "System.Data.SqlClient" -force -verbose
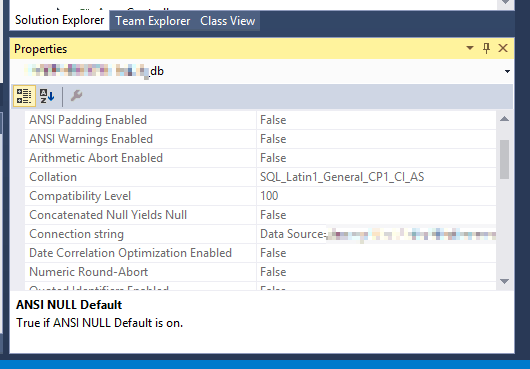
But wait – what if you don’t have your Azure Connection String at hand? No worries, that’s easy to get. With any luck, you’ll already have it saved in your Publish -dialog (see screenshot above). If you don’t, fear not – you can still get the string from SQL Server Explorer, where you’ll have to select your database and click properties. You’ll find the connection string in your Visual Studio’s properties -window.

Oh but well – the problems probably don’t end there. What if you get an error like “Cannot open server – – requested by the login. Client with IP address – – is not allowed to access the server” while you try the deployment? No worries – I’ve described the solution to that error here. Check it out!
With all that, you should be all set – or at least you’ll be getting more useful error messages… :)
- CSOM suddenly throwing exceptions when trying to access list contents in SharePoint? A weird fix. - April 2, 2024
- “Predefined type ‘System.Object’ is not defined or imported” and other System namespace stuff missing in your solution? - March 26, 2024
- How to import GraphQL schema to Postman in Windows? - March 19, 2024


