How to install Copilot Studio Agents in Teams (even when it fails)?
In this week's article I'm sharing some of my experience with installing Copilot Studio Agents in Microsoft Teams. Namely, how to install them even when Teams says "no".
Background
So you have built a beautiful Copilot Studio Agent, and now you want to use it in Microsoft Teams. How do you get it there?
Well, you of course navigate to "Channels" and select "Teams and Microsoft 365 Copilot" as the channel type.
It's such a simple and polished experience that creating and rolling out your agents to your workforce actually feels like a breeze.
Or... Is it?
Problem
When you do this the first time, it appears to "just work". No questions asked, the bot is seemingly installed.
This is a ruse, as the agent is not actually published anywhere.
On the second try (or after refreshing the page), you can actually open this useful little dialog (it doesn't open the first time for whatever reason):
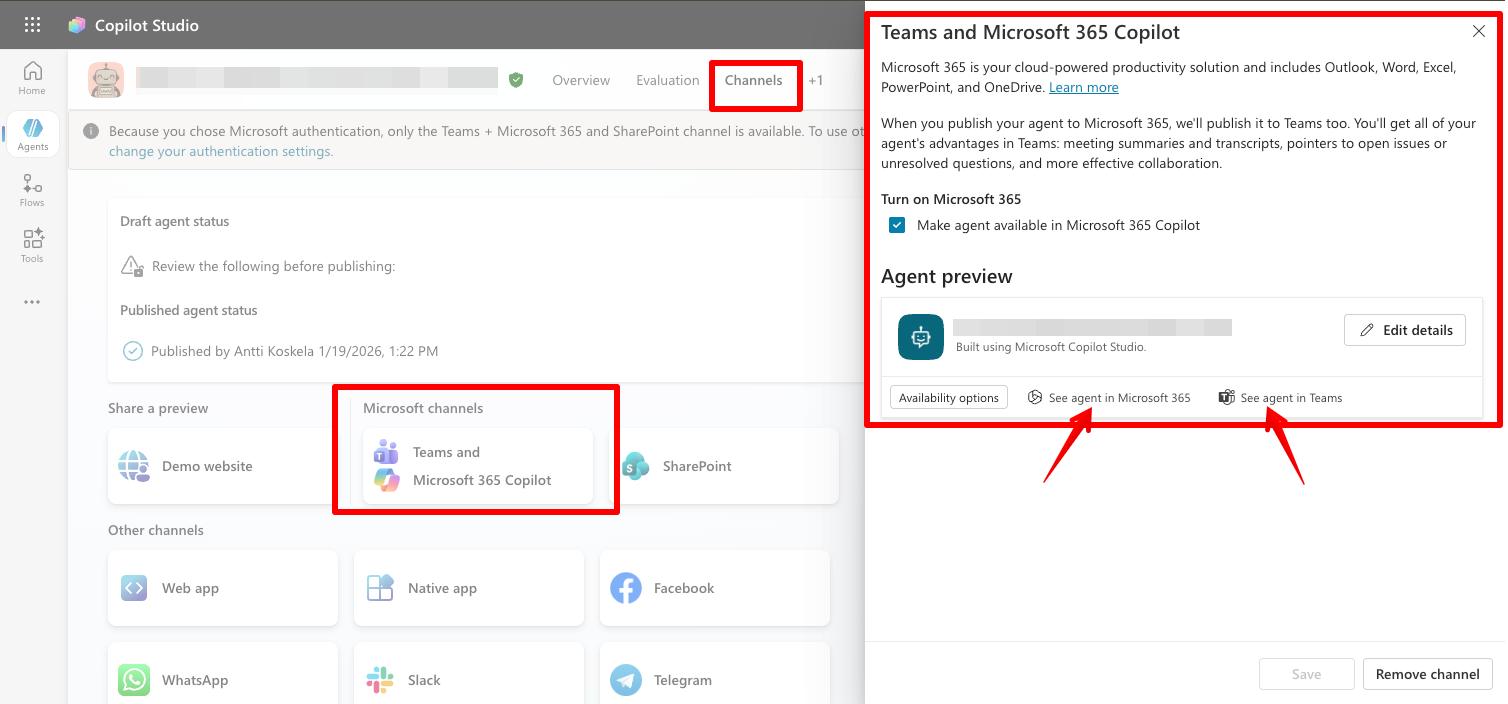
If you click "See agent in Microsoft 365" or "See agent in Teams", you will see something along the lines of this:
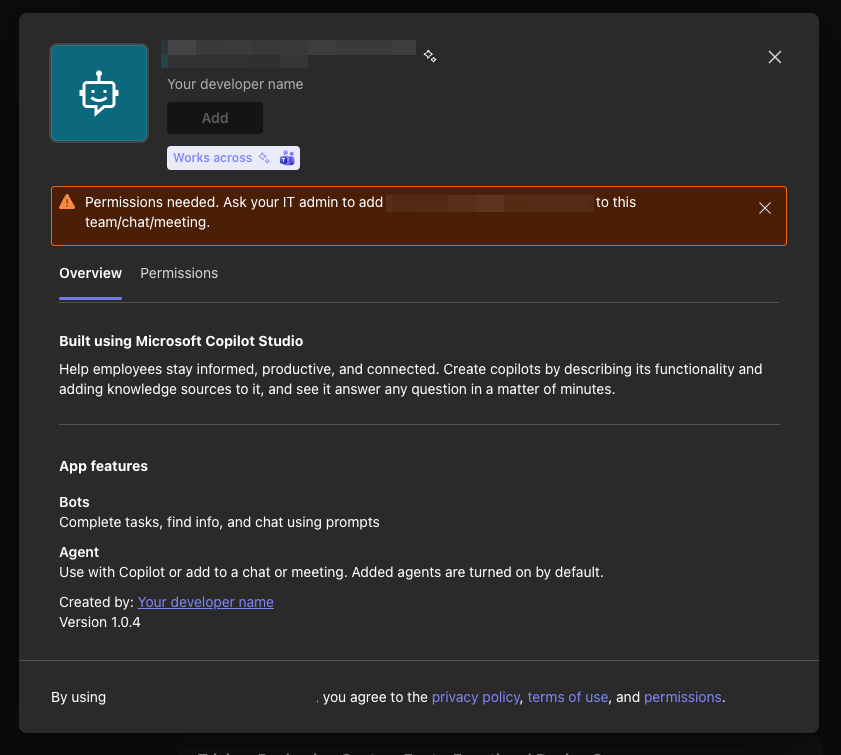
This is, of course, a bit of a problem, if you already are signed in as a Global Admin, and if the agent isn't even visible anywhere in the Microsoft Agent 365 Admin Center.
That said, the solution is simple.
Solution
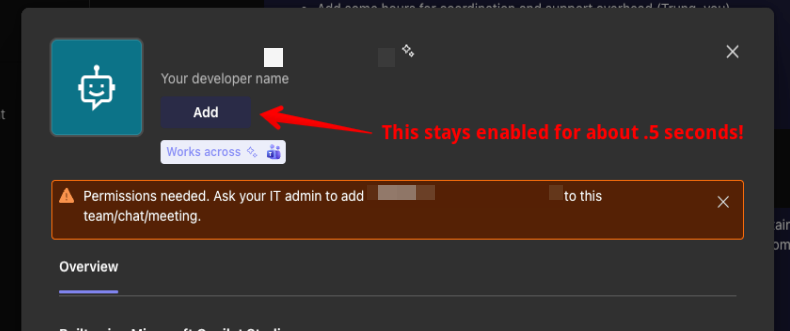
You need to be fast!
Fast enough to click "Add" before it is disabled.
In both cases (Microsoft 365 Copilot and Teams), the "Add" button will stay active for about half a second before it is disabled. And if you click it fast enough, the button will work despite getting disabled after a bit.
... and after that, the bot will be available on Teams just like any other bot. You can add it to your team, and start chatting with it right away.
Fun times 😅
Comments
No comments yet.